A blog about fashion on a budget, DIYs, And living naturally

contact me at votefortennant@gmail.com

Showing posts with label hair. Show all posts

Friday, 13 July 2012

Let's talk about the face!

Ok, I consider myself a pretty average girl. Some days I wear makeup, some days I don't. Today we're going to talk about the days I do. Sometimes I just throw on eyeshadow or something from a travel palette, but occasionally I love to look like a pinup, with a close-to-flawless complexion, and classy eyes and lips.

To Start, moisturizing is very important. Not only does it keep your skin healthier, it helps the makeup stay on. I use:

 Olay Active Hydrating cream. It's scentless, light, and non-oily.


Followed by Clinique's redness solutions tinted green moisturizer. I have some very pink rosacea on my cheeks that is hard to cover up with just foundation. The green tint cancels out the red, and minimizes how much red shows through.

Finally, my new best friend, e.l.f's mineral face primer. It doesn't make me break out, and it lets my liquid foundation stick on evenly and smoothly.

On a day like today when I decide to wear foundation, My regimen could include any or all of the following items.

e.l.f's high definition powder in translucent, cover girl's light liquid concealer, neutrogena's healthy skin liquid foundation (with and without salicylic acid)on 10 Classic Ivory, wet and wild's solid stick concealer, and neutrogena's mineral sheers loose powder foundation.

to apply liquid foundation I use this brush. Unknown brand, natural fibers, bought on ebay. It's smooth and silky, and I love ow it erases any lines and applies smoothly over all areas of my skin. It's easily cleanable with baking soda or shampoo. I apply the liquid foundation with salicylic acid in my T-zone (forehead and nose area) while using the regular healthy skin formula on the rest of my face.

Next I can either use the translucent powder or the mineral powder depending on the look I am going for. Today I used the mineral foundation , which provides a smooth, matte look over the whole face. applied with this brand-less brush from ebay.
finally, for a summery look, I used a contouring brush to apply e.l.f's warm bronzer, focusing on the cheek bones. I don't use bronzer in the winter, but it helps you look fresher and not-washed-out in the summer months.
All that's left is to apply eyeshadow, this is coastal scent's 88 palette in original. I also used a small brush in one of the browns o use this as eyeliner. I used Covergirl's lash blast mascara in brown today.


And Lip stick. I always apply a moisturizing chapstick before applying lipstick to avoid the dry feeling. Today I used lip Vitamin's Almond chapstick. Topped off with Clinique's lipstick in Ginger Flower.

THERE! A classy, every day, yet oh-so-sophisticated look that can easily be worn on a regular day, or for a special event. Granted it's a little high maintenance, but if you want the look, I'd say this is the way to do it!

All done! There is no editing on this picture. Just makeup. And with my hair styled from TBD's tutorial HERE, I feel amazingly cool and classy

Wednesday, 11 July 2012

Natural Hair

I don't use shampoo or conditioner. OK! Before you click away from my blog forever because "ew gross..." Let me tell you about how I take care of my hair, without product, and save money while doing so.

Think about the last bottle of shampoo or conditioner you bought. How much did it cost? Probably somewhere in the range of 12-30 dollars. Which is quite a bit of money. What if I told you that your shampoo is stripping your hair of the natural oils and protectants it provides for itself? I use a mix of baking soda and water in place of shampoo, and apple cider vinegar with water for conditioner. My hair has never felt healthier, or stronger, looked shinier, or been easier to style. It's a cheap and natural alternative. I use approximately one tablespoon of baking soda to one cup of water, and two tablespoons of apple cider vinegar to one cup of water. Scrub, let sit, and rinse just as you would traditional products.

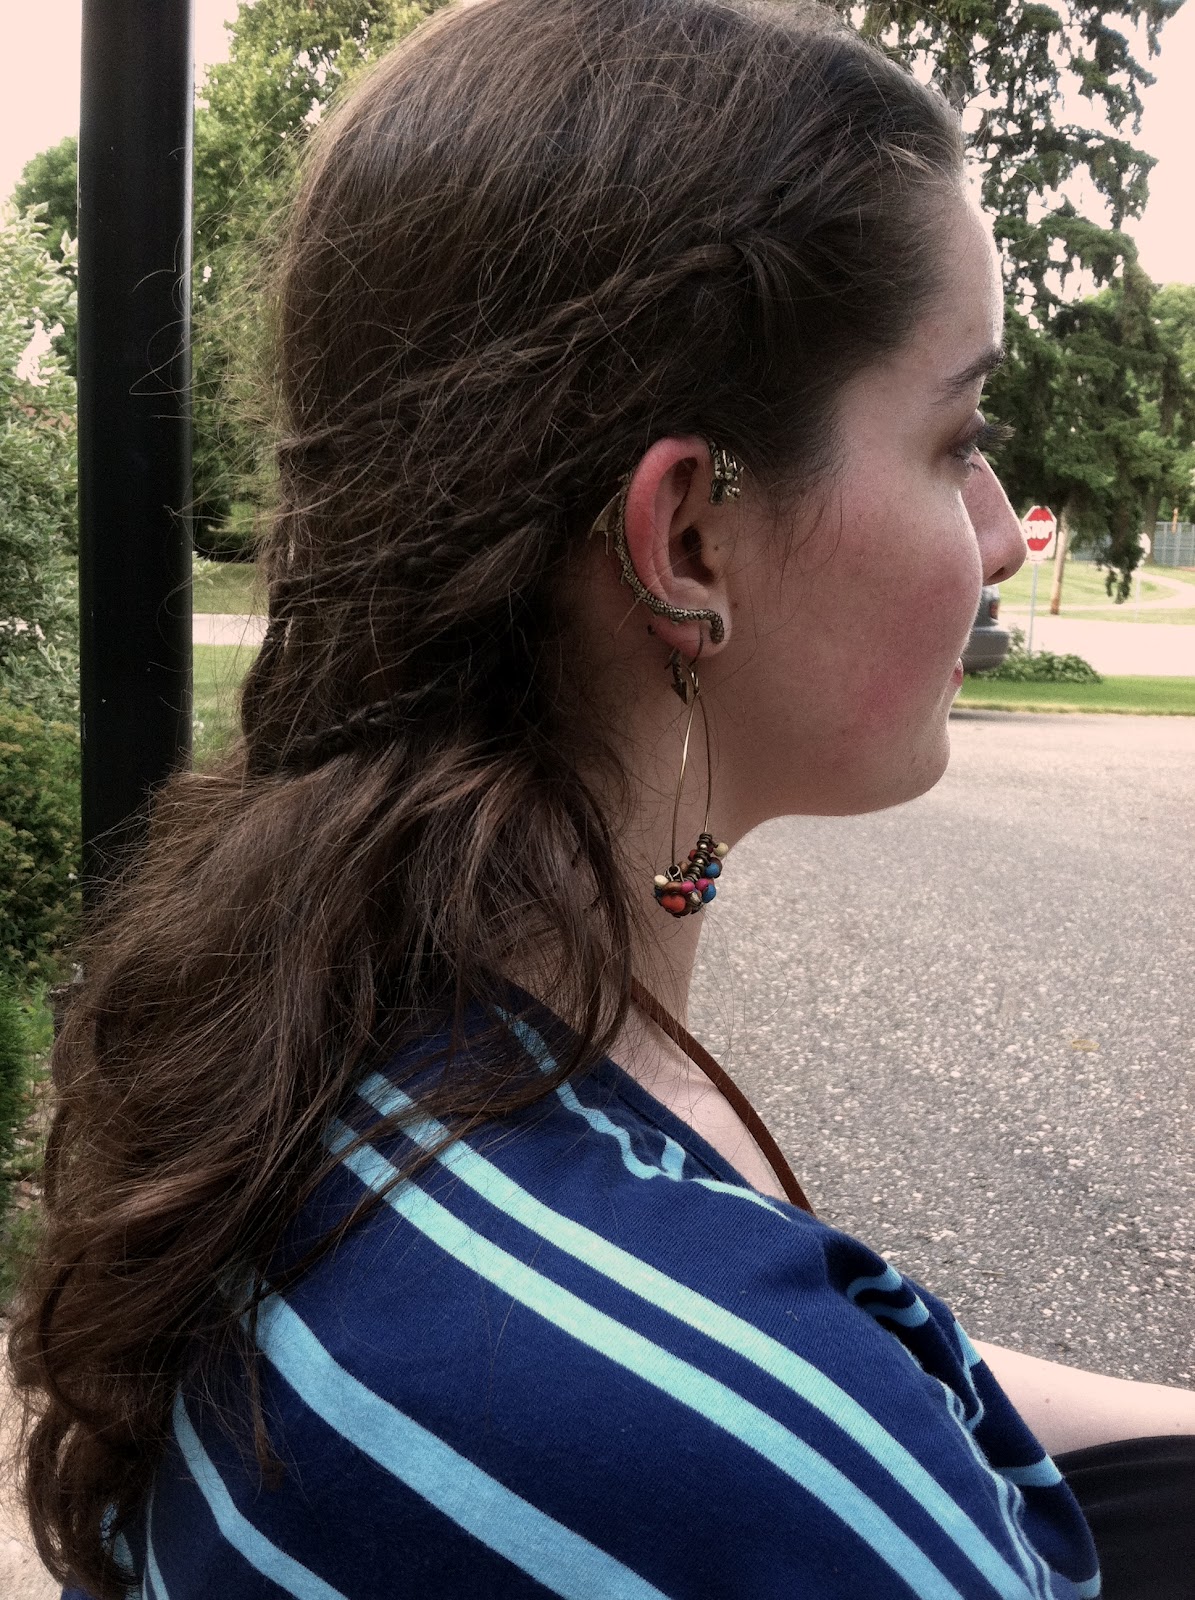
On the note of hair, I was so pleased with how mine turned out today! Styling my hair is one of my favorite ways to amp up an otherwise simple look. I was inspired by the intricate braiding in "Game of Thrones", both on the Kahleesi and the noble women. Amazing styles like

this
And
I decided to combine the two, and came up with a style I was VERY happy with. Right here!

The back!
The side! And my little dragon, also in line
with the Game of Thrones theme here!


Over all the braids work as a sort of cage for my hair, keeping it up and out of the way, while still long and lovely. I may do the braids thicker next time, but for now I feel like a Kahleesi!

Wednesday, 4 July 2012

Foam Rollers Tutorial (plus cleaning)

Ok, One of my favorite things to do with my hair is to make it AS CURLY AS IS HUMANLY POSSIBLE. I have straight/wavy...ish hair naturally, so curling it up is a fun switch for me. However, I also have a LOT of hair, which means standing with my arm in the air with a curling iron/wand is not my idea of a good time. I have some hot rollers too, but I only use those if I didn't think to use my trusty foam rollers first. They're the good old fashioned kind, and they get my hair curly like nothing else. This is not going to turn out like prom hair or barrel curls or anything though, I opt for crazy curls.

Ok, to start with, you need a set of curlers. If your hair is anything like mine, a set of 8 is NOT going to be enough. I have a set of 48 curlers in various sizes by Conair, which I got at walgreens for $10. They come in four sizes.
Pink is the largest, then green, purple, and blue is the smallest. I'm going to be using mostly purple and green today. The thing is, not all of my hair will fit into the set of one color, so I use a smaller size on the top, with the next size up on the lower half of my head.
to insert the curlers, start with barely damp hair, I waited about an hour and a half after my shower. Brush your hair, and place the curler under a 2-inch section of hair, rolling it under and away from your part like in the picture above, this will make the curls look slightly more uniform and natural.

Purple on top, then green, and I ran out of green so I used pink at the very bottom.
Then sleep on  it! It may feel uncomfortable at first but you'll get used to it. If it helps, you can wear a large beanie or scarf on your head to sleep on so that they won't get pulled out while you're sleeping.

In the morning, I pull all the rollers out one by one, starting with the ones at the bottom (pink-green-purple) and shake my head really hard....I whip my hair back and forth so to speak. I also separate some of the more stubborn curls with my fingers. I don't use any product, so it flattens out a little bit, but you can put in hairspray or mousse or whatever you want to keep it just as bouncy as when you first take the rollers out all day.

Finally, I add a headband to tie it all together. This is one of my favorite looks. If I get tired of it by the end of the day I can whip it up into the worlds most fabulous messy bun. (which I will probably show you later.) Hope you enjoy getting your hair as curly as possible.

Finally, if you've used your curlers more than a few times like I have, you may notice they aren't as springy as they used to be, they might also have some residual hairspray or just oil from your hair in them. Turns out they're very easy to clean! I put them all together in this delicates bag and put them in the washer on delicate cold, then I hung up the bag whole and they turned out perfectly. In fact, I did that just before using them for this tutorial. Clean hair products keep your hair healthy!

Ciao! Have a happy fourth of July!

Update, here's the messy bun I mentioned. It's great to have curls in a bun cause of all the volume!